

Craft Ideas
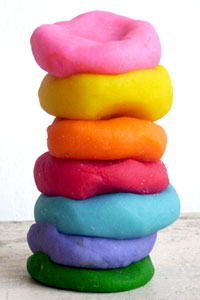 Play dough
What You Need:
- 1 cup flour
- 1/2 cup cooking salt
- 1 cup water
- 1 tablespoon of cream of tartar
- 1 tablespoon of cooking oil
- Food colouring
Process
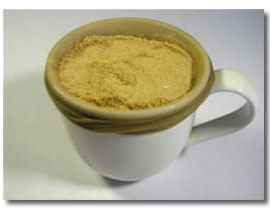
Mix the flour, water, salt and cream of tartar in a saucepan over medium heat until thick. Allow the mixture to cool and then add the oil and knead well over a floured cutting board or similar.
Divide this blob evenly into as many colours as you'd like to make. Add food colouring to each ball until it is just the colour your child is looking for.
That's it! Allow the children to let their imaginations run wild by smooshing it, moulding it and rolling it. They can create wild and whacky shapes with the play dough.

Witches hats
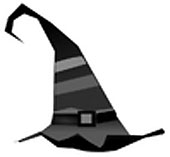
What You Need:
-
2 sheets black cardboard
- 1 sheet of felt (Green, orange, purple or red)
- 1 sheet of black felt
- Craft glue
- Scissors
- Tape
- Permanent markers
- Glue
- Collage craft eg. Buttons, wool, sequins, fabric, glitter, coloured paper, feathers, streamers etc
Process:
Roll 1 sheet of black paper into a cone, and secure with tape. Trim the bottom of the cone so that it will stand up on the table.
Cut the second sheet of black paper into a ring - make it larger than the bottom of your cone, as this will be the brim of your hat. Glue the ring to the cone and set aside to dry.
Cut 1-2cm strips of felt and glue them around the cone - make concentric circles around your hat so it looks stripy, or try gluing the felt in a spiral from the bottom of the cone to the top, in a continuous line.
Cut a strip of black felt to go around the base of the cone. This will cover any messy glue left behind after attaching your cone to the brim.
Now allow the children to be creative by decorating the hat as they like. Use spots of felt, or cut out your shapes and glue those on their black hat. Add colourful bats and cats, feathers and glitter!
Now let the magic begin!
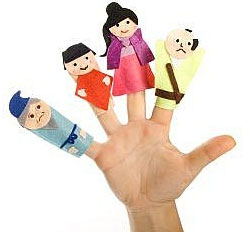 Finger Puppets
What You Need:
- Old gloves
- Permanent markers
- Glue
- Collage craft eg. Buttons, wool, sequins, fabric, coloured paper, feathers, streamers etc
Process:
Cut off the fingers from a pair of gloves. The closed end works best as the head! Encourage the children to decorate them. Glue some wool or feathers on for hair, buttons for the eyes or nose and so on. Use permanent markers to draw whatever features that are missing.
|
|
 Grass heads
What You Need:
- Old nylon stockings or pantyhose. Knee highs and pop socks
- Grass seeds. You can buy a small "lawn repair kit" which has seeds pre-mixed with slow release fertiliser, but you can use whatever seeds you've got handy. I hear that rye or alfalfa seeds also work well.
- Sawdust or potting mix for stuffing. Or just some soil from your garden.
- Small yoghurt pot.
- Decorations. Goggly eyes and fabric scraps for the heads, coloured paper for the bodies, pipe-cleaners for spectacles... get creative :-)
- Water-proof glue. For sticking on the eyes, lips, etc. Hot glue is often water-proof. (any glue that does not dissolve in water)
Process:
 |
 |
|
|
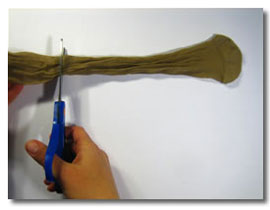
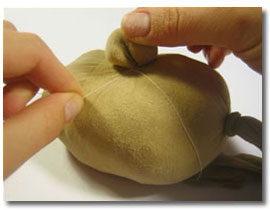
Step 1: Cut off an 8" (20cm) section of stocking that includes the toe. |
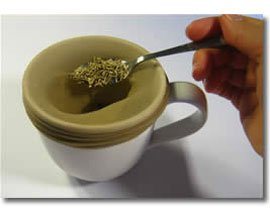
Step 2: Stretch the stocking over a large cup or mug, and spoon in about 2 teaspoons full of grass seeds. | |
|
|
 |
|
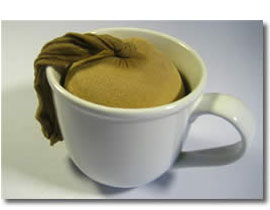
| Step 3: Pack in some sawdust or potting soil. Aim for the head to be roughly tennis ball sized. | Step 4: Tie a knot to close the end. No need to cut off the dangly bit. | |
|
|
|
|
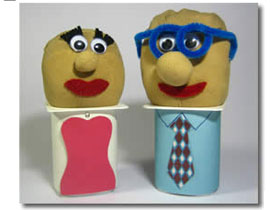
| Step 5: You can make a bulbous nose or ears by grabbing a bit of stocking and twisting. Fasten base of the nose with some thread or a small rubber band. | Step 6: Decorate! Use fabric scraps or permanent marker to decorate the face, and coloured paper to make the yoghurt container into a dress or a suit or whatever you like - get creative! Just make sure that any glues or markers you use for the head are water-proof. | |
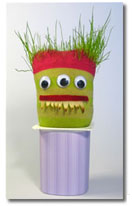 |
When you're ready to grow your head, give it a good dunking in a bowl of water to moisten the sawdust/soil. Half-fill the yoghurt container with water, and put the head on top, with the excess stocking dangling down into the water. Put your creation on a windowsill or somewhere with plenty of sunlight. Check every day to make sure the head is moist - you might need to dribble a few drops of water onto the head now and then. "Hair" takes about 1 week to sprout. A full head of hair takes 3-4 weeks to grow, and "greying and balding" will occur after about 6 weeks. Experiment with different hairstyles :-) You can make mohawks, pony-tails, crew-cuts... have fun with it! |
|
 Paper plate maracas
What You Need:
- 2 paper plates
- Dried beans, rice or popcorn
- Stapler
- Paint, crayons or texters
- Crepe paper streamers (optional)
Process:
Place a handful or two of dried beans, rice, or popcorn onto a paper plate. Staple a paper plate securely on top of it. Decorate the maracas with crayons, markers, or paint.
Optional: Staple long crepe paper streamers to the maracas.
Now SHAKE IT SHAKE IT SHAKE IT !!!
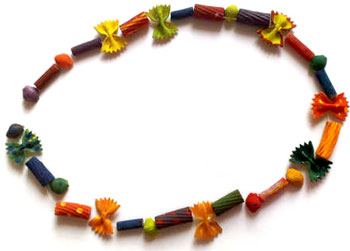 Pasta Necklaces
What You Need:
- Penne Pasta
- Water
- Plastic take-away containers
- A variety of food colouring / edicole dye
- String
Process:
Step 1. - Pour about 10 drops of food dye into half a cup of water in a container such as a plastic take-away containers. Then place one cup of pasta into the dyed water. After only a few minutes remove the pasta and place it onto absorbent paper to allow it to dry. Ensure the pasta does not become too wet when placed into the water as it will be difficult to use later if this happens. Once on the paper place the pasta in a warm spot and leave it to dry completely. You may repeat this with as many colours as you desire.
Extenstion: (Optional) - Once the pasta has you may wish to spread the pasta lightly with glue and roll it in glitter this will make the new jewellery even more impressive.
Note : You may want to dress the children in clothes you do not mind getting stained as you will be placing the pasta into containers of food dye which could easily splash onto clothes.
Step 2. - When fully dry your little one can take the pasta and attempt to thread it onto pieces of string. You can suggest colour patterns for their new bracelet, necklace or crown or let them come up with their own ideas.
Skills:
These pasta necklaces are designed to improve your child’s dexterity and fine motor skills of threading. If you create colour patterns this will also assist your little one’s early mathematical development
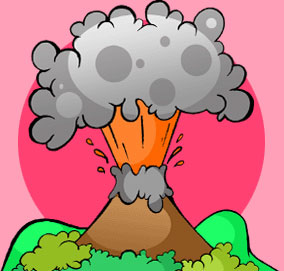 Volcano Experiment
What You Need:
- Flour
- Salt
- Cooking oil
- Water
- Large bowl
- Plastic bottle
- Baking pan
- Red food colouring
- Liquid detergent
- Baking Soda
- Vinegar
Process:
- Mix 6 cups of flour, 2 cups of salt, 4 tablespoons of cooking oil and 2 cups of water in a large bowl.
- Mix the ingredients together with your hands until the mixture is firm. Stand the bottle in the centre of the pan.
- Mould the salt dough around the bottle in a cone shape (like a volcano) but leave the bottle top uncovered.
- Fill the bottle almost to the top with warm water. Add a few drops of food colouring.
- Squeeze 6 drops of detergent into the bottle. Add 2 tablespoons of baking soda.
- Slowly pour vinegar into the bottle. Your volcano will fizz and spurt red lava! Why? Mixing baking soda and vinegar makes a chemical reaction.
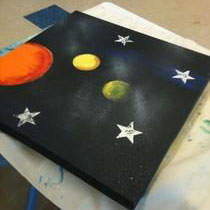
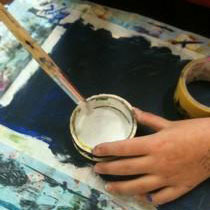
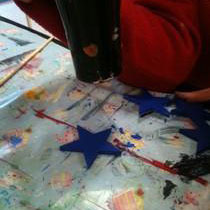
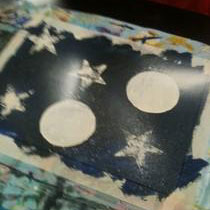
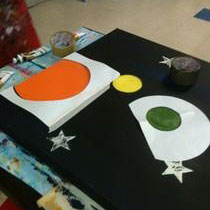
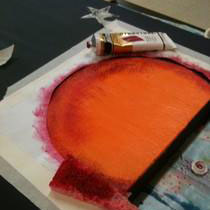
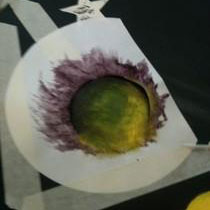
Out of Space Art
 |
 |
| Kids love out of space and planets and stars. Yesterday I taught this art class to 14 students. Great results. On a canvas looks good so that they can hang it up in their rooms. $2 shop canvas is fine. |
First - paint the entire canvas navy blue or black and dry with hair dryer. |
 |
 |
|
While I was at Bunnings , I also bought some wooden star shapes ($1 ea) and a can of white spray paint. These stars can be painted and stuck onto the canvas with wood glue or dipped into white paint ( thin coat ) and pressed onto the canvas like a stamp. |
Next - use white spray paint to splatter distant stats onto the canvas. Or use an old tooth brush to flick or splatter stars on |
 |
 |
|
.Once dry - use paper to cut out a stencil to protect the area around the planet shapes. Use masking tape roll to make exact circle shape again. |
Sponge in diff colours over the white planet shapes. It's important to have the white house paint underneath the colour so that the colour stays fresh and bright. In other words- if you painted a yellow planet on a blue back ground without the white paint underneath- the yellow would turn green. (yellow+ blue= green). |
|
|
|
|
Use a textured kitchen sponge to shade around one edge of the dry coloured circle shapes. |
|
This craft courtesy of
http://beauxdesign.blogspot.com
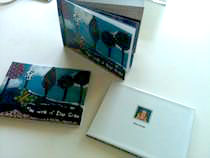
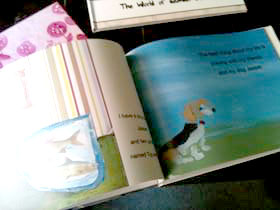
How to keep Children's Art work
If you have the same problem as I have with hundreds of lovely art works coming home from kindy and Pre school and only want to keep the best to remember - but not have a giant folder ( or three)
Why not make a photo book - a coffee table book printed with their art work inside.
This is also a great keepsake , lovely gift for grandparents and makes the kids feel very important as their work is " published".
You can get the kids to answer some great questions like : what is my favourite pet, super hero , holiday etc etc and get them to draw/ paint it and add text , dates and ages etc.
I've found Snap fish to be a good online site and kmart too. Books cost around $30 for 20 pages.
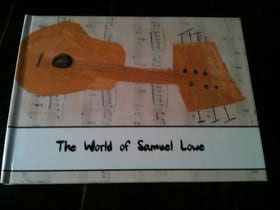
I run regular art classes and last year a friend and I ran a 7 week course getting kids (age 5-12)to illustrate their own books.
The work was amazing and the parents were stoked.
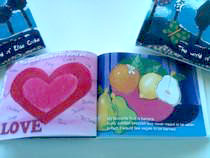
But I have also been saving my daughters best art works too.
These are going into their own photo books.
Collage of paper and fabrics is great , cos this all provides great texture to the work and is ideal for little ones who need help.
Eg: using fruit fabric bellow- kids cut out pieces of their fav friut and drew a fruit bowl. Stuck fruit fabric on with glue.
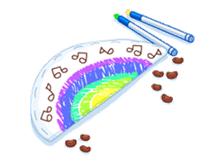
Musical instruments and other things were drawn on photocopied sheet music- another
Great and effective idea that looks stunning white washed and printed.
 |
 |
 |
 |